 how-to
Tips for Managing Ping Pong Robot Drills
Table of Contents
- How to Structure a Ping Pong Robot Practice Session
- Setting Table Tennis Robot Settings for Beginners
- Table Tennis Robot Footwork Drills That Build Consistency
- Determining Table Tennis Robot Training Session Length
- Choosing Pre-Programmed Versus Custom Drill Patterns
- Tracking Progress and Adjusting Drill Difficulty
- Common Mistakes to Avoid During Robot Practice
- Frequently Asked Questions
Last Updated: October 5, 2026
How to Structure a Ping Pong Robot Practice Session
A well-structured ping pong robot practice session follows a three-phase framework: warm-up, drill execution, and cool-down, which forms the foundation of effective ping pong robot drills. This progression prepares your body, maximizes training focus, and prevents fatigue or injury.
Warm-Up Phase
Start every session with 5-10 minutes of light movement. This phase gets your muscles ready and your mind focused on the drills ahead.
A good warm-up includes:
- Light footwork around the table without hitting balls
- Gentle arm circles and shoulder rolls
- 2-3 minutes of easy rallies at low ball speed
- Dynamic stretches targeting your legs, hips, and shoulders
The warm-up raises your heart rate gradually and preps your nervous system for quick reactions.
Drill Execution Phase
This is where the real work happens. Dedicate 25-40 minutes to focused drills that target specific skills.
Stay mentally engaged during drill execution. Each ball should feel intentional. Robot settings, ball speed, placement, and frequency, shape what your body learns.
Cool-Down and Recovery
End with 5-10 minutes of light activity and stretching. This phase signals to your body that the intense work is done.
A proper cool-down includes:
- 2-3 minutes of very easy rallies at the lowest robot speed
- Static stretches held for 20-30 seconds each
- Focus on legs, hips, lower back, and shoulders
- Deep breathing to bring your heart rate down
Your muscles continue adapting after you stop hitting balls, so don't skip this critical recovery window.
Setting Table Tennis Robot Settings for Beginners
Robot settings control what your body learns. Progress through settings in stages tied to measurable performance, not arbitrary time intervals.
Progressive Speed and Frequency Framework
Stage 1: Foundation (Weeks 1-2)
- Ball speed: 30-35 mph
- Frequency: 15-20 balls per minute
- Sweep range: Narrow (12-15 inches)
- Entry criteria: None; start here
At this speed, you can see the ball clearly and build solid contact.
Stage 2: Consistency Building (Weeks 3-4)
- Ball speed: 35-40 mph
- Frequency: 20-25 balls per minute
- Sweep range: Narrow to medium (15-20 inches)
- Entry criteria: 16 out of 20 balls cleanly for two sessions
You're building rhythm and footwork patterns. Track your consecutive-ball count (how many in a row without error) as your primary metric.
Stage 3: Footwork Integration (Weeks 5-6)
- Ball speed: 40-45 mph
- Frequency: 25-30 balls per minute
- Sweep range: Medium to wide (20-28 inches)
- Entry criteria: 18 out of 20 balls cleanly for three sessions
Widening the sweep forces lateral footwork. Your success rate may drop initially, this is normal. You're building a new skill.
Stage 4: Speed and Spin (Weeks 7+)
- Ball speed: 45-55 mph
- Frequency: 30-40 balls per minute
- Sweep range: Wide (28+ inches)
- Spin variation: Introduce topspin, backspin, or mixed feeds
- Entry criteria: 15 out of 20 balls cleanly with wide sweep for two sessions
Speed and spin variation demand quick decision-making and stroke adaptation.
Measuring Performance to Know When to Progress
Don't guess when you're ready to advance. Use these metrics:
-
Consecutive-ball count: Track your best streak each session. When it reaches the exit threshold, you're ready to move up.
-
Success rate out of 20: Record how many balls land cleanly. Advance when you hit the exit threshold for two consecutive sessions.
-
Form check: Video yourself at each stage. If form breaks down before hitting the exit threshold, stay longer. Technique matters more than speed.
Oscillator and Sweep Range Configuration
The oscillator makes the robot move the ball side to side. The sweep range controls how wide that movement is.
For beginners in Stage 1, set your oscillator to "on" with a narrow sweep (12-15 inches) to keep balls near the center. As you progress, gradually widen the sweep to force lateral movement.
Adjusting for Your Recovery and Energy
If practicing 3-4 times per week, progress through stages roughly every 2 weeks. If practicing 1-2 times per week, extend each stage by 1-2 weeks. If you plateau for more than 3 weeks, change the drill type while keeping speed and frequency the same.
Table Tennis Robot Footwork Drills That Build Consistency
Footwork separates good players from great ones. A robot lets you practice footwork patterns repetitively until they become automatic.
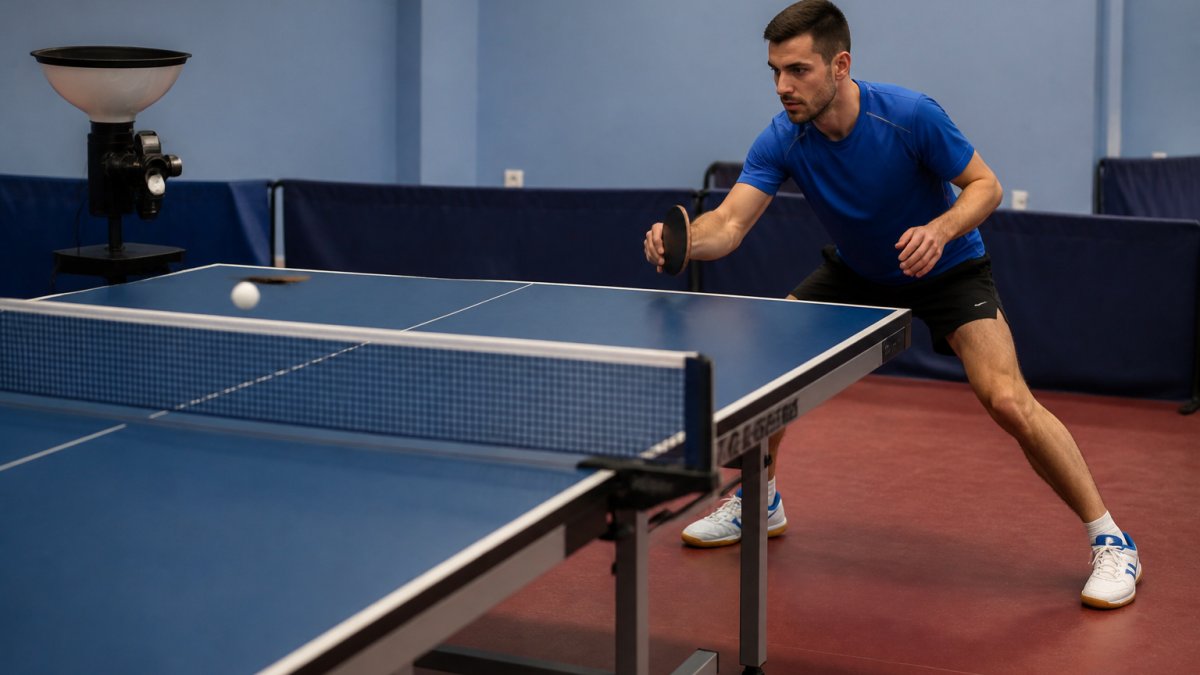
Wide Placement Drills for Lateral Movement
Set your robot to a wide sweep range and moderate ball speed (35-45 mph). Feed balls across the full width of the table.
Move your feet to stay behind each ball, hit it solidly, and return to the center. Don't reach with your arm. Do this drill for 8-10 minutes per session, 3-4 times per week.
Short Ball and Long Ball Alternation
Program your robot to alternate between short balls (landing near the net) and long balls (landing near the baseline). Start with a 1:1 ratio. Once you handle that, try 2:1 to increase difficulty.
Determining Table Tennis Robot Training Session Length
How long should a table tennis robot training session be? The answer depends on your skill level, recovery capacity, and training goal. A generic 45-60 minute recommendation ignores individual differences and the risk of overuse injury.
Session Length by Skill Level and Goal
Beginner (Stages 1-2): 40-50 minutes total
- Warm-up: 8-10 minutes
- Drill execution: 25-30 minutes
- Cool-down and recovery: 5-10 minutes
Beginners fatigue faster because every stroke demands conscious attention. Shorter, focused sessions prevent mental fatigue and bad habits.
Intermediate (Stages 3-4): 50-70 minutes total
- Warm-up: 8-10 minutes
- Drill execution: 35-50 minutes
- Cool-down and recovery: 7-10 minutes
You can sustain focus longer and tolerate longer drill blocks without form breakdown.
Advanced (Stage 4+): 60-90 minutes total
- Warm-up: 10 minutes
- Drill execution: 45-70 minutes (often split into 2-3 drill blocks with 2-3 minute breaks between)
- Cool-down and recovery: 10 minutes
Advanced players can handle longer sessions because their strokes are automatic. However, longer doesn't always mean better.
The Drill Block Structure: Preventing Fatigue and Technique Breakdown
Don't hit balls continuously for 40 minutes straight. Instead, structure your drill execution into blocks with built-in breaks.
Recommended drill block structure:
- Drill block 1: 12-15 minutes (one drill type)
- Rest: 2-3 minutes (light stretching, hydration, mental reset)
- Drill block 2: 12-15 minutes (different drill type or same drill with increased difficulty)
- Rest: 2-3 minutes
- Drill block 3: 8-12 minutes (optional; depends on energy and recovery)
This structure keeps your nervous system fresh. Within each drill block, track your form. If your footwork slows, strokes become tense, or success rate drops by more than 20%, end the block early. Quality beats quantity.
Recovery Capacity and Session Frequency
Session length also depends on how often you practice and how well you recover between sessions.
If you practice 3-4 times per week: Sessions can be 50-70 minutes.
If you practice 5-6 times per week: Reduce session length to 40-50 minutes to prevent overuse injury.
If you practice 1-2 times per week: You can extend sessions to 60-75 minutes.
Track how you feel 24 hours after each session.
Stopping Rules: When to End Early
You don't always need to complete your planned session. Use these stopping rules to prevent overuse:
-
Form breakdown rule: If your footwork slows or success rate drops by more than 25%, end the session.
-
Heart rate rule: If your resting heart rate is elevated by more than 5-10 beats per minute, take a rest day or do a 30-minute easy session.
-
Pain rule: If you feel sharp pain in your shoulder, elbow, wrist, or knee, stop immediately and rest for 1-2 days.
-
Mental fatigue rule: If you can't focus after 40 minutes, stop.
-
Consecutive-session rule: After 5 consecutive sessions, take a rest day.
Sample Session Plans by Time Available
30-minute session: Warm-up 5 min, drill 20 min, cool-down 5 min. Use when short on time or recovering.
50-minute session: Warm-up 8 min, drill block 1 (15 min), rest 2 min, drill block 2 (15 min), cool-down 10 min.
75-minute session: Warm-up 10 min, three drill blocks (18, 18, 15 min) with 3-min rests between.
Choosing Pre-Programmed Versus Custom Drill Patterns
Pre-programmed drills work best if you're new to robot training, they take the guesswork out of setup. Custom drills work best if you have a specific weakness to fix. Many players start with pre-programmed drills to build a foundation, then switch to custom drills to target specific skills.
Tracking Progress and Adjusting Drill Difficulty
Track three metrics: consecutive-ball count, speed increase, and drill duration. Write these numbers down after each session. When you hit a number three times in a row, increase difficulty. If you plateau for more than 2 weeks, change your drill.
Common Mistakes to Avoid During Robot Practice
Mistake 2: Neglecting footwork. Move your feet on every ball.
Mistake 3: Skipping warm-up and cool-down. They prepare your body and help recovery.
Mistake 4: Using the same drill every session. Change drills every 2-3 weeks.
Mistake 6: Practicing when fatigued. Rest instead. Quality beats tired practice.
Effective ping pong robot drills require structure, smart settings, and consistent tracking. Our handmade ball collector breaks down in half for easy transport and lets you scoop up balls without bending over.
Start with pre-programmed drills, track your numbers, and adjust difficulty as you improve.
Frequently Asked Questions
How long should you practice with a ping pong robot?
Most players benefit from 30-45 minute robot practice sessions, 3-4 times per week. Beginners should start with 20-30 minutes to build endurance without overuse injury. Session length depends on your fitness level, training goals, and available time. Quality matters more than duration, focused 30-minute drills beat unfocused 60-minute sessions. Track how you feel after each session and adjust to maintain consistency without fatigue.
What are the best drills to do with a table tennis robot?
Effective robot drills include forehand and backhand loop practice, wide placement drills for footwork, short ball and long ball alternation, and spin variation exercises (topspin, backspin, chop). Start with pre-programmed drills to build fundamentals, then progress to custom patterns that simulate match scenarios. Include consecutive return drills to build rally consistency and timing. Vary ball placement and speed within each drill to prevent adaptation plateau.
Can you improve at table tennis by practicing only with a robot?
Robots build stroke consistency, footwork, and timing effectively, but match play requires additional skills. Robot practice excels at repetition and technique refinement, you can hit 100 identical forehands to groove your swing. However, match play involves unpredictable opponent shots, tactical decision-making, and mental pressure that robots don't replicate. Combine robot training with regular match play, multi-ball coaching, and human opponents to develop complete skills.
How do you set up a table tennis robot for footwork practice?
Start with a wide oscillator sweep range to force lateral movement across the table. Set ball frequency high enough to challenge your footwork without overwhelming your timing, typically 10-15 balls per minute for beginners. Alternate between short and long ball placement to require different recovery positions. Use a regular pattern initially to establish footwork habits, then switch to random patterns to improve adaptability. Adjust ball speed gradually as your movement improves.