 how-to
Table Tennis Practice at Home: Boost Efficiency
Table of Contents
- Why Table Tennis Practice at Home Works (When You Train With Purpose)
- What You'll Need Before You Start
- Step 1: Build a Weekly Table Tennis Practice Routine
- Step 2: Essential Table Tennis Drills at Home
- Step 3: Table Tennis Footwork Drills for Small Spaces
- Step 4: How to Pick Up Ping Pong Balls Without Bending
- Step 5: Measure Progress and Fix Common Solo-Practice Mistakes
- Conclusion: Turn Home Practice Into Match Wins
- Frequently Asked Questions
Last Updated: October 15, 2026
Why Table Tennis Practice at Home Works (When You Train With Purpose)
Improving table tennis practice efficiency at home comes down to one thing: purposeful repetition. A short, focused session beats a long, distracted one every time.
The table tennis practice you do alone can be more effective than casual hitting with a partner. Why?
But here is what most guides get wrong: they hand you a list of drills with no plan. Random practice builds random skills.
Below, we break down a step-by-step system for home training.
What You'll Need Before You Start
You need very little to start table tennis drills at home. A table helps, but a wall, a floor, and a ball will do for many drills.
Here is a simple starter list:
- A table tennis table (any size works for most drills)
- At least 20 balls, so you can run multi-ball practice without stopping
- A paddle with decent grip
- A wall or a rebounder for rebound training
- A ball launcher or table tennis robot (optional, but useful)
- A ball picker tool to speed up cleanup
- A clear floor area of about 2 by 3 meters
Space is the biggest limit for most homes. You do not need a full room. A hallway or garage corner works for footwork and wall drills.
Step 1: Build a Weekly Table Tennis Practice Routine
A table tennis practice routine should fit your level and your available time, not a generic template. The most common failure at home is not a lack of effort, it is effort spent on the wrong thing. Before you build a week, run a two-minute diagnostic.
The Two-Minute Diagnostic
Pick the failure that costs you the most points in real matches, then match it to a drill category:
- You lose points on your own serve. Your serve is either too readable or too safe. Priority: serve placement and variation.
- You lose points on the third ball. Your serve is fine but your follow-up is late. Priority: serve-plus-footwork combinations.
- You lose long rallies. Your consistency breaks down under repetition. Priority: wall or rebound rallying and ball control.
- You get caught flat-footed. You arrive late to the ball. Priority: footwork and recovery drills.
- You freeze under pressure. Your technique holds in practice but not in matches. Priority: scored drills and match simulation.
Write down one priority. That priority gets the first and freshest minutes of every session, because the first minutes are when your form is cleanest.
The Time-Efficiency Rules
Short daily blocks beat one long weekend session because motor skills consolidate between sessions, not during them. Three rules make a short block work:
- Warm up in under two minutes. Shadow strokes and side shuffles, no stretching routine.
- Front-load the priority. Spend the first half of the session on your diagnostic priority, the second half on maintenance.
- End on a scored rep. Finish with a measurable target so you leave with a number, not a feeling.
Sample 7-Day Schedule by Level
Each block includes a warm-up, a priority block, and a scored finish. Adjust the minutes, not the structure.
| Day | Beginner (20 min) | Improver (30 min) | Advanced (40 min) |
|---|---|---|---|
| Mon | Forehand drives, 3x20 clean contacts | Serve + footwork, 4x10 reps | Multi-ball attack, 5x15 balls |
| Tue | Backhand pushes, 3x20 | Wall rallying, beat your record | Serve variation, 6 targets x 10 |
| Wed | Rest or light rally | Footwork ladders, 3x30 sec | Match simulation, 3 games to 11 |
| Thu | Serve basics, 40 serves to one zone | Robot drills, 4x20 balls | Reaction time work, 4x20 sec |
| Fri | Wall practice, 3 timed rallies | Block and push, 4x15 | Multi-ball footwork, 5x15 |
| Sat | Ball control games, 10 min | Serve consistency, 50 serves scored | Pressure rallies, 3 sets to 11 |
| Sun | Rest | Rest | Recovery session, 15 min |
For beginners, the goal is clean contact and control. For improvers, it is linking strokes to movement. For advanced players, it is speed under fatigue. If you only have 15 minutes on a given day, keep the priority block and drop the maintenance block, never skip the scored finish.
USA Table Tennis coaching resources
Step 2: Essential Table Tennis Drills at Home
Most guides hand you a list of drills and leave you to guess which ones matter. That is backwards. The drill should follow the problem, not the other way around. Use the diagnostic from Step 1 to pick your drill category, then use the drills below to fill it.
Drill Selection by Weakness and Match Goal
| Your problem | Drill category | Best home drill |
|---|---|---|
| Inconsistent serve | Serve placement | 50 serves to one target zone |
| Weak third ball | Serve + footwork | Serve, split-step, attack the return |
| Rallies break down | Ball control | Wall rally to a record count |
| Late to the ball | Footwork | Side shuffle and split-step sets |
| Poor touch | Feel drills | Paddle bounce and floor-to-paddle |
| Freezes under pressure | Scored drills | Serve as if the score is 10-10 |
Pick one category per session. Rotating categories within a single session dilutes the repetition that makes a skill stick.
Solo Drills Without a Partner
These solo drills build touch and timing, and they need no table:
- Ball bounce control: Bounce the ball on your paddle, alternating forehand and backhand faces. Target 50 clean bounces without a miss.
- Floor-to-paddle: Drop the ball and hit it softly upward, keeping it low and controlled. Target 30 controlled reps.
- Serve repetition: Serve 50 balls to one target, then switch targets. Count how many land in the zone.
- Shadow strokes: Practice forehand and backhand swings without a ball to groove form. Do 3 sets of 20.
Wall and Rebound Training
Wall training is one of the most underrated tools for home practice. A wall or rebounder gives you a training partner that never misses.
Stand about two meters from the wall. Hit forehand and backhand drives, aiming for a consistent contact point. Count your rally. Try to beat your record each session.
Wall practice sharpens reaction time, ball placement, and stroke technique. It also works in tight spaces, which makes it ideal for apartments and small rooms.
Small-Space and Noise-Conscious Adaptations
If you live in an apartment or share walls, standard advice about bouncing balls and hard wall hits does not survive contact with your neighbors. Here is what actually works:
- Clearance: You need roughly 2 by 3 meters of clear floor for footwork, and about 2 meters of distance from the wall for rebound drills. Measure before you commit.
- Ball containment: A laundry basket, a cardboard box on its side, or a bedsheet draped over a doorway catches balls and cuts cleanup time. Containment also reduces the number of balls rolling under furniture.
- Low-noise alternatives: A foam or low-bounce ball against a padded wall cuts the sharp crack of a hard hit. Paddle bounce and floor-to-paddle drills are nearly silent and still train touch.
- Timing: Hard wall hits carry through floors. Schedule rebound sessions earlier in the day and save quiet drills for late evening.
Step 3: Table Tennis Footwork Drills for Small Spaces
Table tennis footwork drills decide how well you play under pressure. Good footwork gets you into position early, which improves every stroke.
You can train footwork in a small space with no table at all. Use these drills:
- Side shuffle: Move side to side in a low stance for 30 seconds.
- Split-step bounce: Practice the split step, then explode to one side.
- Shadow footwork: Mimic the movement for a forehand, then recover to the ready position.
- Cone or marker drills: Place markers on the floor and move between them.
The recovery position matters as much as the first move. After every stroke, return to a balanced, ready stance. This habit carries straight into matches.
Aim for three sets of each drill. Keep your knees bent and your weight on the balls of your feet.
Step 4: How to Pick Up Ping Pong Balls Without Bending
If you want to know how to pick up ping pong balls without bending, the answer is a handheld ball scoop.
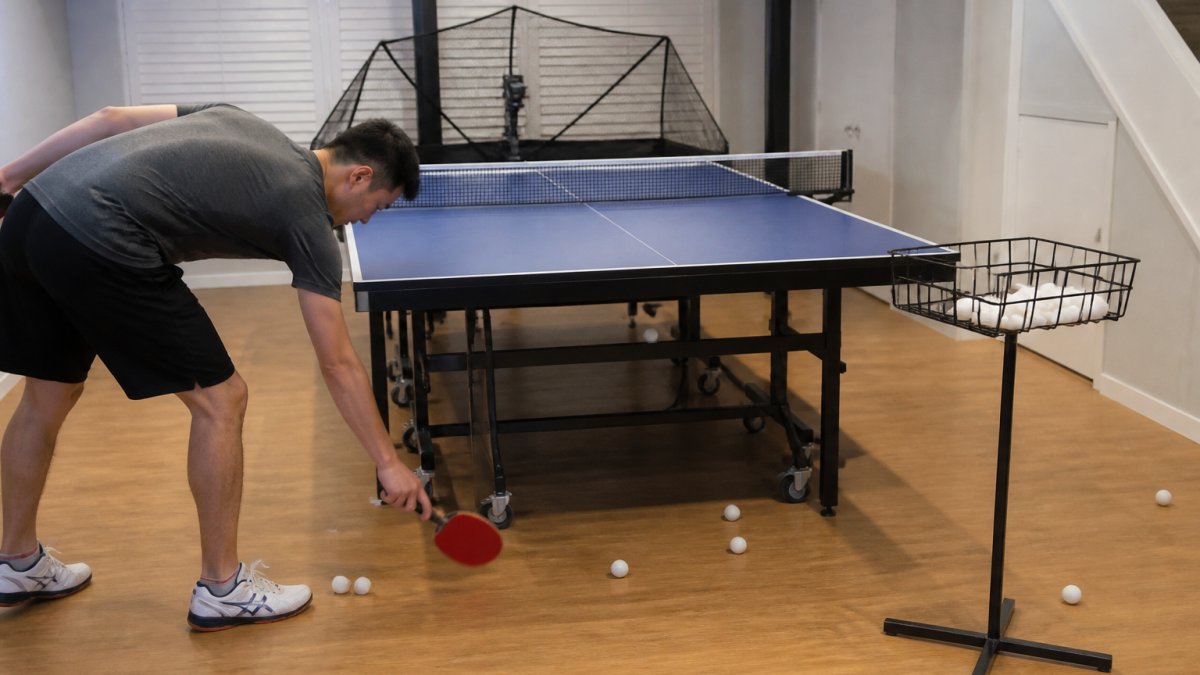
This matters more than most players admit. Multi-ball practice and robot sessions scatter hundreds of balls across the floor.
MyPingPongBuddy makes a handmade scoop tool built for exactly this job.
The payoff is simple: less time crawling on the floor, more time practicing. Players with back pain get to keep training without paying for it later.
Step 5: Measure Progress and Fix Common Solo-Practice Mistakes
You cannot improve what you do not track. Measuring progress turns home practice into a real training program instead of random hitting.
Track three simple numbers each week:
- Rally count: Your longest wall or rebound rally.
- Serve accuracy: How many serves land in your target zone out of 20.
- Footwork speed: Time your side-shuffle sets and watch the trend.
Now the mistakes. These are the ones we see most often:
- Practicing without a goal. Pick one skill per session.
- Skipping footwork. Strokes fail when your feet are late.
- Training too long, too rarely. Short daily blocks win.
- Ignoring recovery. Rest days prevent injury and burnout.
- Letting cleanup kill your focus. A ball picker keeps you in the zone.
Transferring solo drills to real matches takes one extra step. Add pressure to your drills. Serve as if the score is 10-10. Move as if the next ball decides the game.
ITTF player development guidance
Conclusion: Turn Home Practice Into Match Wins
The gap between practice and match play is where most players stall. They drill in comfort, then freeze under pressure.
MyPingPongBuddy helps you protect your practice time. Our handmade scoop collects balls without bending, breaks down in half for easy storage, and clears the floor in seconds so you can get back to training.
Get started with MyPingPongBuddy and spend your energy on your game, not on the floor.
Frequently Asked Questions
How long should a table tennis practice session at home last?
A focused 20 to 30 minute session beats a scattered hour. Split it into 10 minutes of serve practice, 10 minutes of footwork or shadow drills, and 5 to 10 minutes of wall or robot rallying. If you have more time, add a second short session later in the day rather than one long grind. Short, consistent table tennis practice builds muscle memory faster than occasional marathon sessions.
Can I improve at table tennis without a partner or a table?
Yes. Serve practice needs only a paddle and balls, and you can serve into a target on the floor or against a wall. Shadow footwork drills, bounce-and-catch ball control, and wall rallying all build touch and movement without a table. Many players improve their serve consistency and reaction time this way. Add a rebound board or robot later if you want more rally-like reps.
What is the best way to collect ping pong balls without bending over?
Use a handheld scoop or roller-style collector instead of picking balls up by hand. A good scoop lets you gather balls while standing upright, which protects your lower back during long training sessions. Look for a tool that is durable enough for daily use, portable enough to store in a small space, and simple enough that kids and students can use it too. MyPingPongBuddy's scoop is built for exactly this.
How do I know if my home practice is actually working?
Track three things: serve consistency (how many of 20 serves land in your target zone), rally length against a wall or robot, and footwork recovery speed. Log these weekly in a notebook or phone note. If serve consistency and rally length improve over 4 to 6 weeks, your table tennis practice is working. If not, change one drill at a time and re-measure.